
Hello netinfo(niggas), i had to resurect this post because some of our users still find it difficult to change DNS settings on their system, so here i will show you how to manually assign DNS (Domain Name Service) servers for your Internet connection using Windows 7.
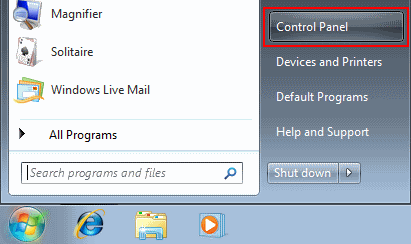
- Go to the Start Menu and click Control Panel
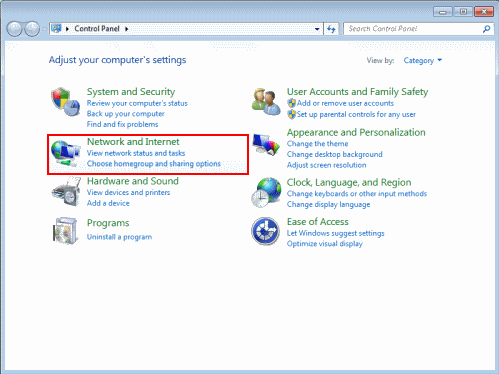
- In the Windows Control Panel, under Network and Internet, click View network status and tasks.
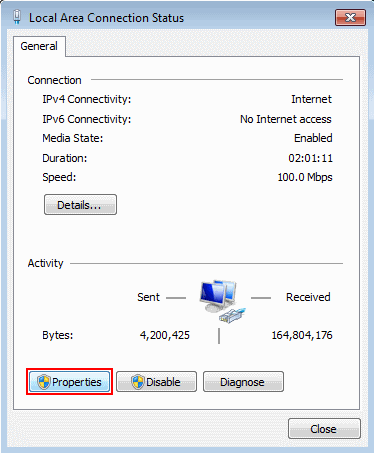
- Click the link next to Connections on the right. In this screenshot we're using a wired connection so the link is called Local Area Connection. If you're using Wireless the link will be named differently.

- You'll see a connection status window, click Properties.
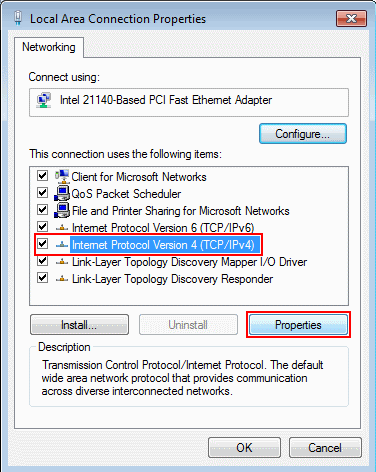
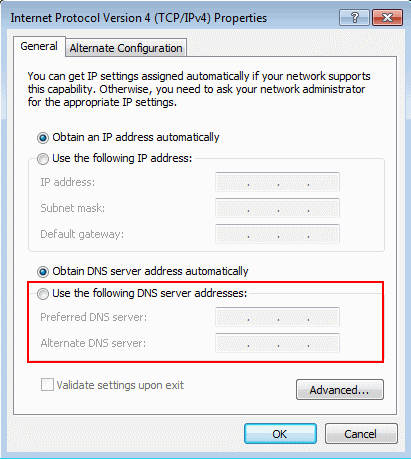
- Select the Internet Protocol Version 4 (TCP/IPv4) item, and click the Properties button.
- Select Use the following DNS server addresses, and enter:
- Preferred DNS server: 212.159.13.49
- Alternate DNS server: 212.159.13.50
- Finally click the OK in this and the previous windows to save your changes.If you find this article informative enough, then LIKE our Facebook page.
Very informative. Keep up d good work bro.
ReplyDelete@Tito, thnks 4 appreciating
ReplyDeleteI love dis @Chris. Keep up d gud work
ReplyDeleteOga Chris aikin ka na kyau.
ReplyDeleteDebbyzeus, thnks for making out time to comment.
ReplyDeleteThanks again
@Farouk, although I dnt understand that, but I knw as usual u wish me well.
ReplyDeleteThanks
Hahahaha @Chris Lols i knw u dnt undstnd Hausa bt it means Good Work
ReplyDelete@Farouk, i thought as much, bcus i knw anytime you comment, its to appreciate my wrk.
ReplyDeleteThanks alot
nyc work
ReplyDeleteThnks Femi, i appreciate.
ReplyDelete